-
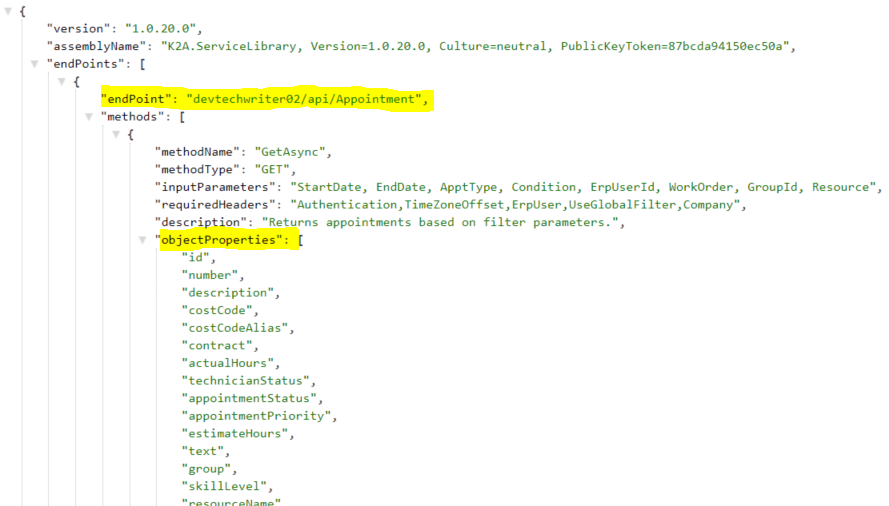
Open K2AServiceLibraryMeta in your browser. (See Schedule Metadata.) Locate the endPoint and objectProperties. Within each endPoint, objectProperties have been added that lists the properties associated with the endPoint with a method of GET by the object name, which are used in our JSON files. See the Example: endPoint List for a list of endPoints you can add. This does not list the unvalidated user-defined fields (UDF).

-
Open the columns.json file located in C:\Program Files (x86)\Signature\Schedule\Scripts\K2A. Inside each of the grid folders, you will find the columns.json file. Open this file with a text editor.
Only the grid folders that contain the columns.json file are customizable. If there isn't a columns.json file then the grid will only have the columns displayed.
-
Locate the position where you want the column to display. For example, as the last column.
Required columns and/or their required location are noted in the file.
-
Copy the information from the current last column, including the curly brackets { }, and paste this directly below.
-
Add a comma ',' to the closing curly bracket } of the former last column.
-
Edit the following:"label": The information within the quotation marks displays as the column header."id": Enter the field name exactly as it appears in the endPoint in K2AServiceLibraryMeta.
-
Save the columns.json file.
-
Launch Schedule and view the column that was just added. If the column doesn't display, you may need to reset the grid. Resetting the grid will reset the existing columns to their original location in the grid. To reset a grid, select Menu and then select About, select the grid name from the Reset Grid drop-down and then select Reset.
For example, to add the Service Call Creation Date to the Unscheduled Grid on the Schedule Board, add the following in the UnscheduledGrid\columns.json file:
{
"label": "SC Created",
"width": "150",
"type": "dhxcalendar",
"align": "left",
"sort": "date",
"id": "callCreationDate"
}
